DigitalOcean Spaces
Step 1: Create a new Space
- Login to your DigitalOcean account
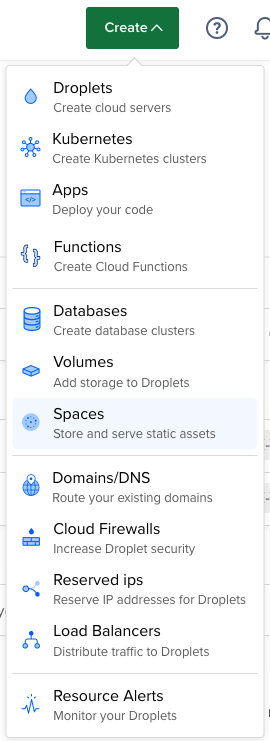
- Click the "Create" button in the header and choose "Spaces"

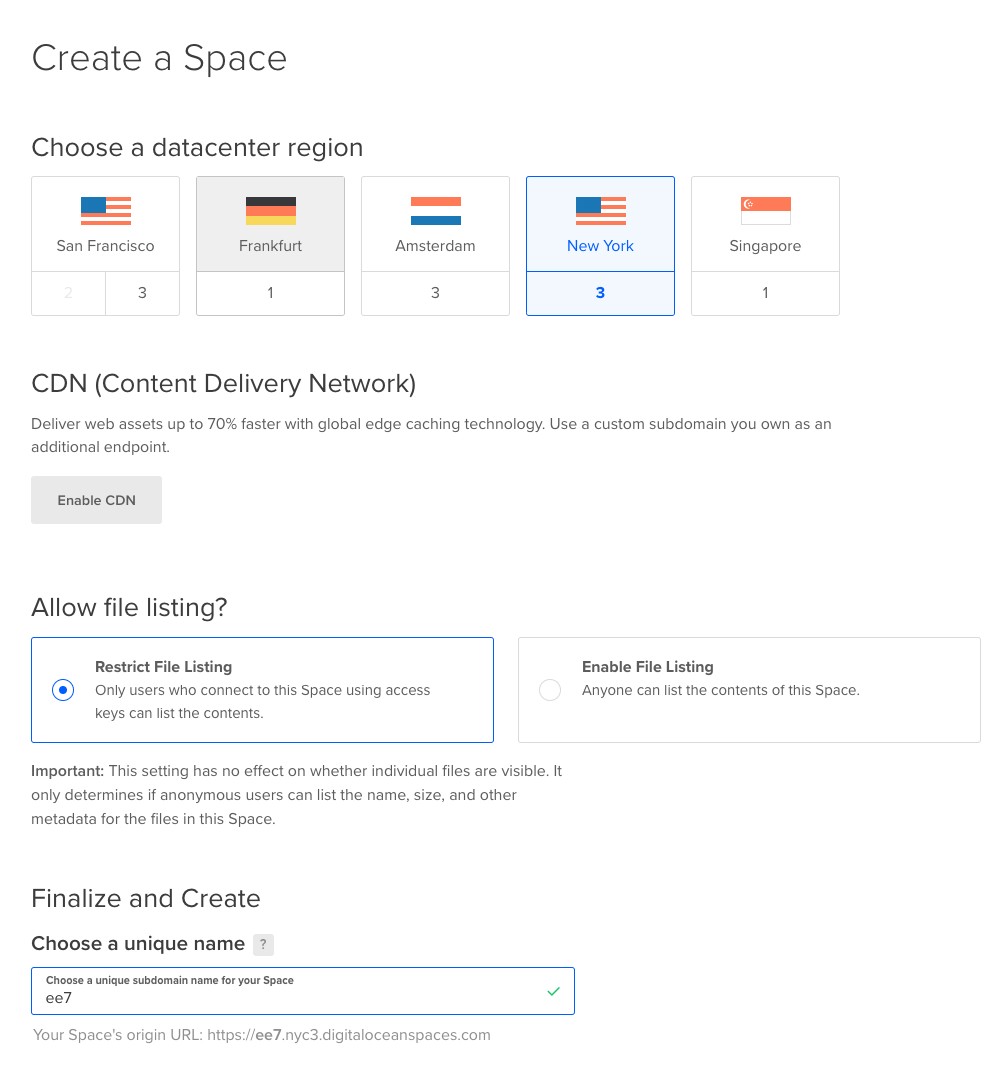
- Populate this form with your desired settings. Make a note of the Space's
nameandregionbecause you will need these later when configuring ExpressionEngine
Step 2: Create an API User
- In the side navigation click "Manage - Spaces"
- Now above the listing of Spaces click the button to "Manage Keys"
- Under "Spaces access keys" click "Generate New Key"
- Give this key a name to help you remember what it is used for and click the checkmark button to create the key.
- Now you will see the credentials and be able to copy the "Key" (on top) and the "Secret" (on bottom) which will be necessary for configuring ExpressionEngine
Step 3: Configure ExpressionEngine
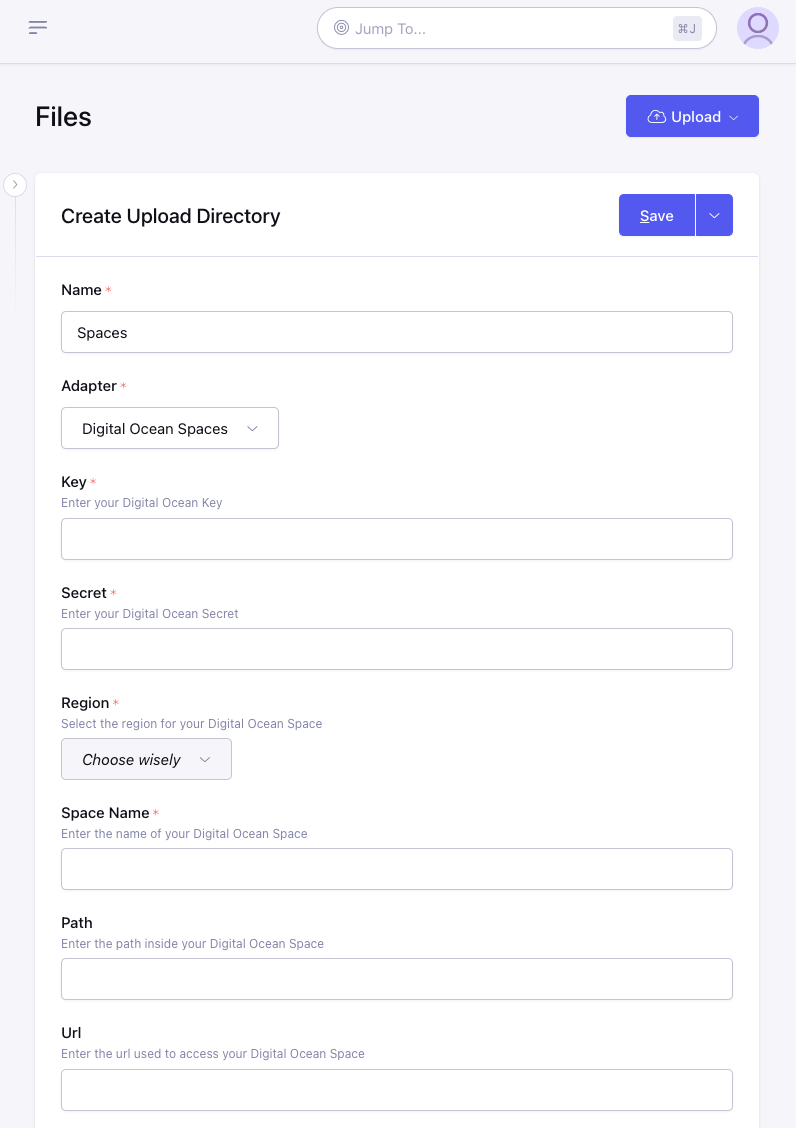
- Create a new Upload Directory
- Enter a name and choose "DigitalOcean Spaces" for the Adapter
- Enter the "Key" from Step 2.5 into the Key field
- Enter the "Secret" from Step 2.5 into the Secret field
- Choose the correct Region for this space selected during Step 1.3
- Enter the Space Name which was chosen during Step 1.3
- Optionally you can specify a Path inside your space where the directory should store files and folders. Please note this path is only used for file storage and manipulation, you may need to add this path to your Url as well depending on your configuration.
- Optionally you can specify a Url to use as the base when generating links to files in the space. This can be useful for having a CDN handle requests to your files.
- Continue to configure the directory how you normally would and click "Save".
