Amazon S3 Adapter
Step 1: Create an S3 Bucket
- Go to Amazon Web Service Console and Login.
- Search for "S3" in the top search bar and click the first result

- Click on "Create Bucket" button and populate the form with your desired settings. Make a note of the bucket
nameandregionbecause you will need these later when configuring ExpressionEngine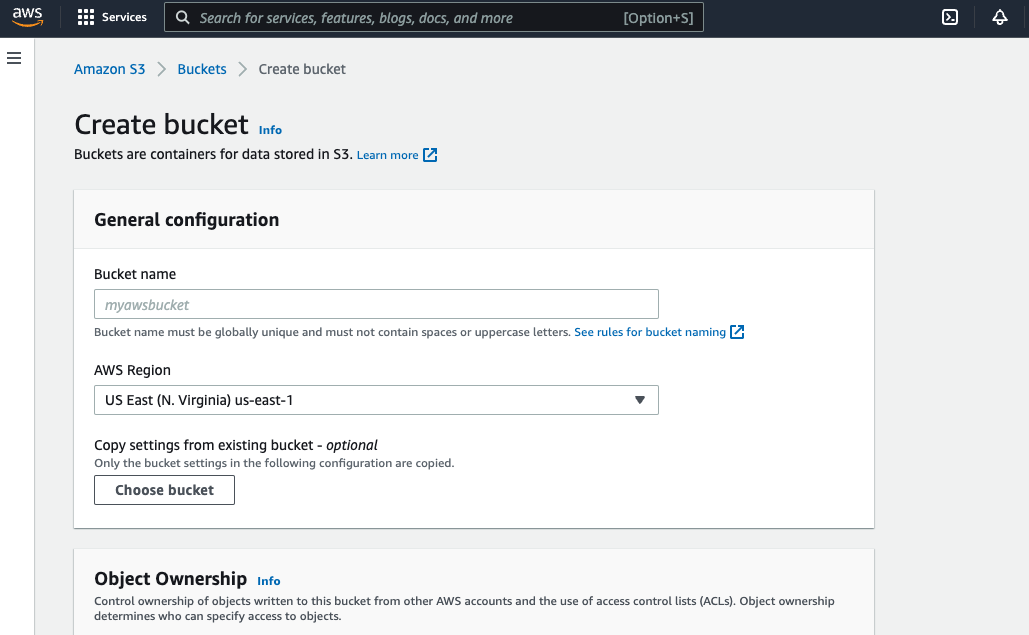
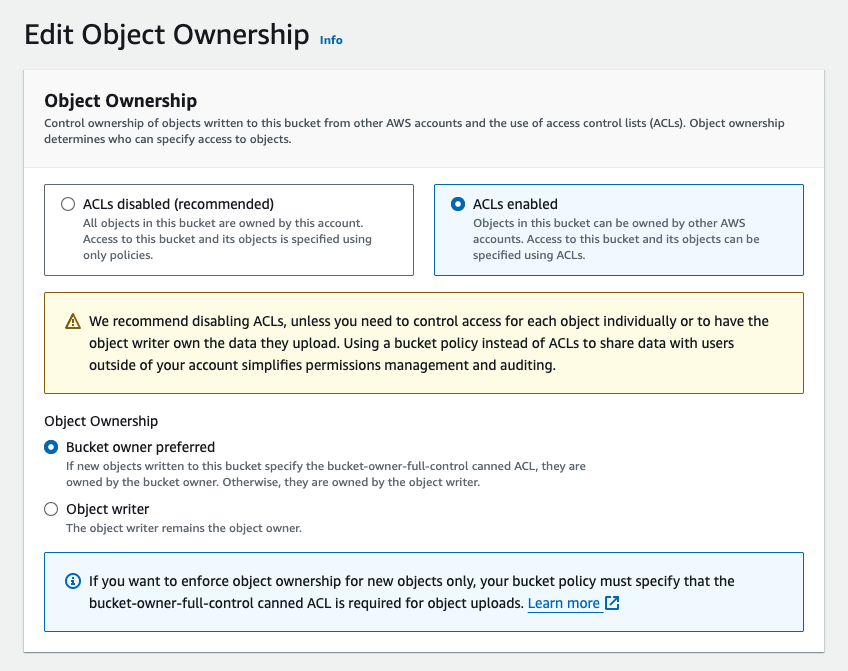
- Enable ACL - Go to the Bucket > Permissions Tab then scroll down to "Object Ownership" and click on Edit. Click "ACL Enabled" and choose Object Ownership - Bucket Owner preferred
Step 2: Create an IAM User with Full S3 Access
- Search for "IAM" in the top search bar and click the first result
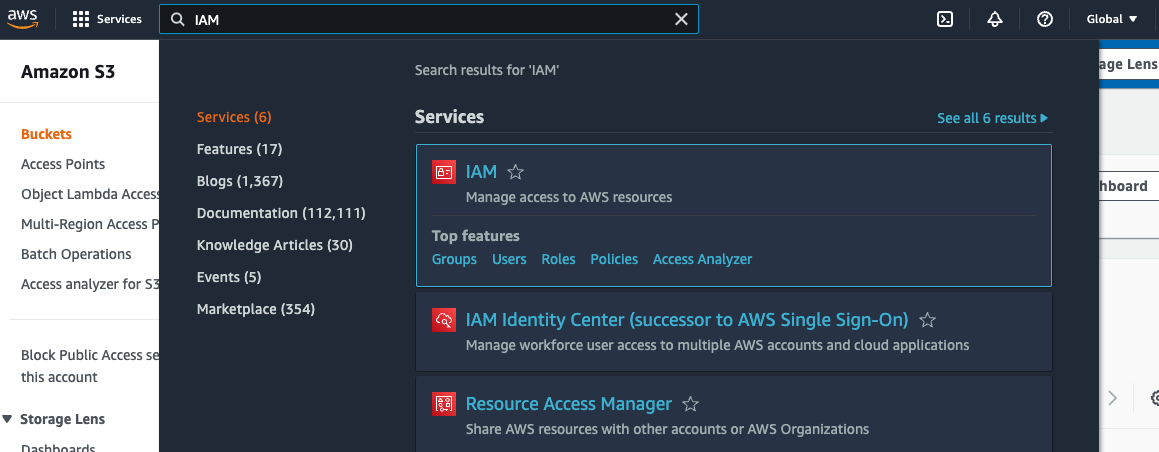
- In the side navigation bar under "Access Management" click "Users"
- On the Users page there is a button to "Add Users", click this
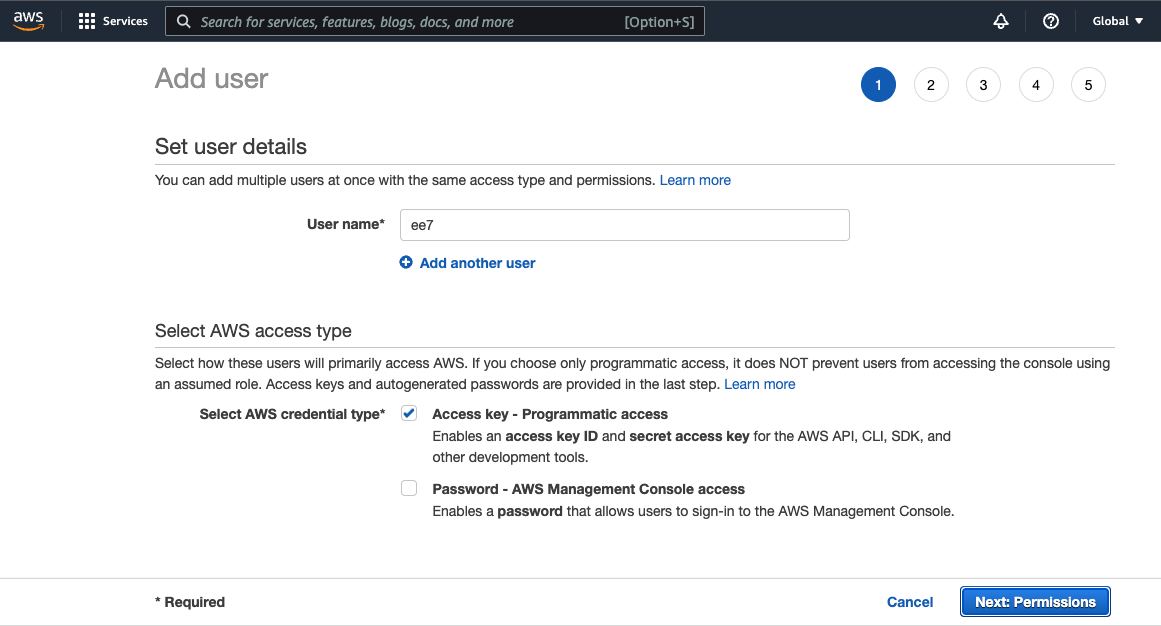
- Enter the User Name and select "Programmatic access" for the access type. Then click "Next" at the bottom of the page.
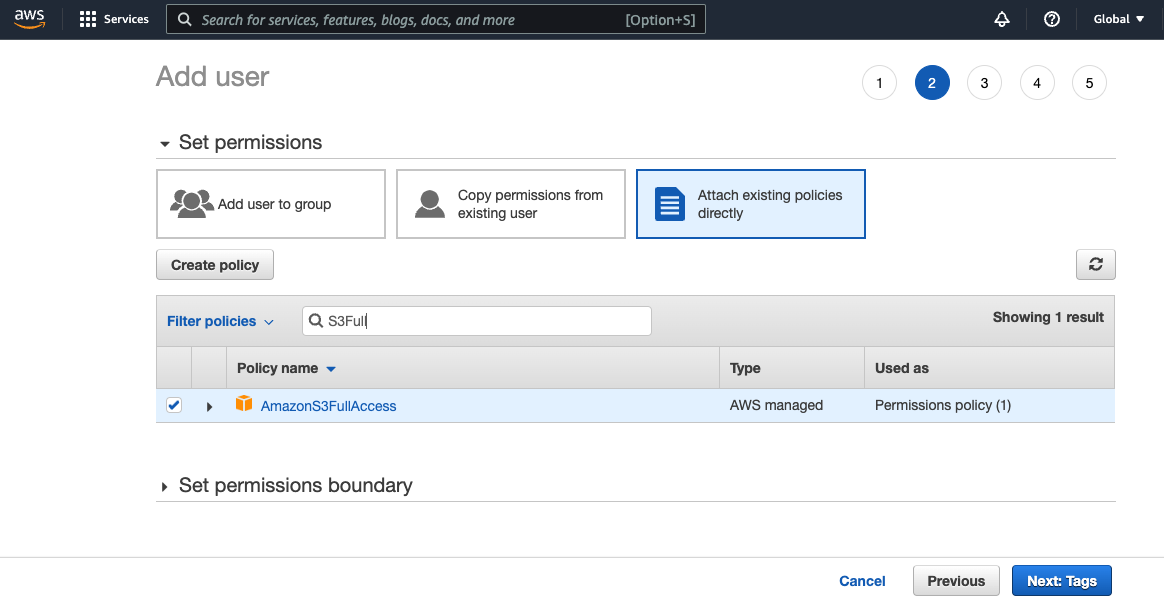
- Select "Attach Existing Policy Directly" and type "S3Full" in the search bar and check the box next to "AmazonS3FullAccess" and then click "Next"
- Tags are optional so you can skip this page and click "Next"
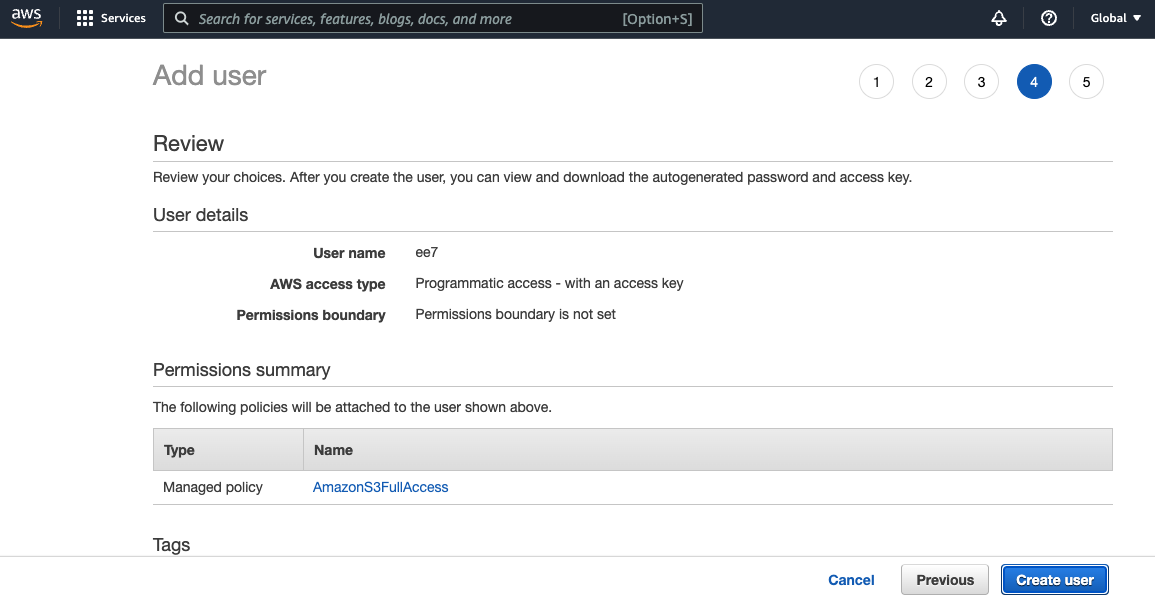
- Review the details of your new account and click "Create User" button
- Now you will see the new user and you will be able to copy "Access key ID" and "Secret access key" credentials which will be necessary for configuring ExpressionEngine
Step 2a: Create an IAM User with Restricted Access
- Follow items 1-4 from Step 2 above
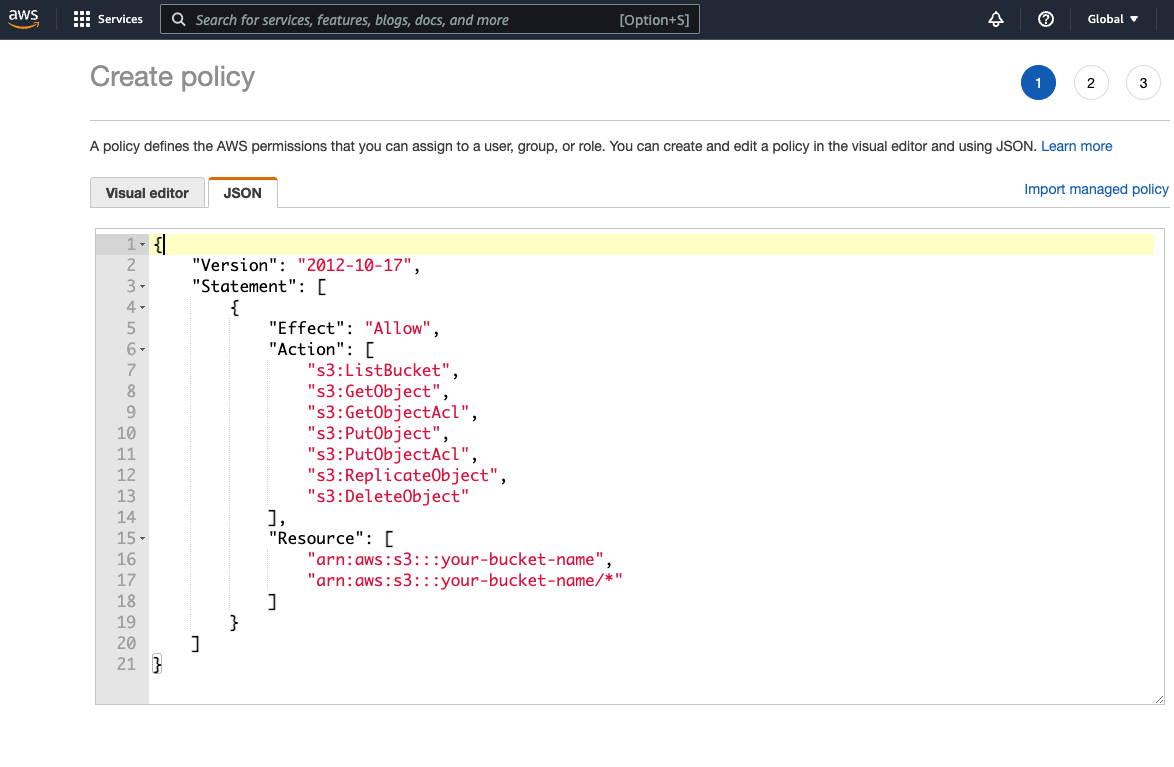
- Click "Create Policy". This should open a new window, do not close the old one, we will come back to that. Select the "JSON" tab and paste in the following content. Make sure you substitute
your-bucket-namewith the name of your bucket created in Step 1.
{
    "Version": "2012-10-17",
    "Statement": [
        {
            "Effect": "Allow",
            "Action": [
                "s3:ListBucket",
                "s3:GetObject",
                "s3:GetObjectAcl",
                "s3:PutObject",
                "s3:PutObjectAcl",
                "s3:ReplicateObject",
                "s3:DeleteObject"
            ],
            "Resource": [
                "arn:aws:s3:::your-bucket-name",
                "arn:aws:s3:::your-bucket-name/*"
            ],
            "Condition": {
                "StringEquals": {
                    "s3:x-amz-acl": "bucket-owner-full-control"
                }
            }
        }
    ]
}
 3. Tags are optional so you can skip this page and click "Next"
4. Give the policy a name like "{your-bucket-name}-access"
5. Click "Create Policy"
6. Go back to the old IAM User window and hit the refresh icon above the policies list
7. Type the name of your new policy in the search bar and check the box next to your new policy name and then click "Next"
8. You can now return to Step 2.6 and finish setting up your user
Step 3: Configure ExpressionEngine
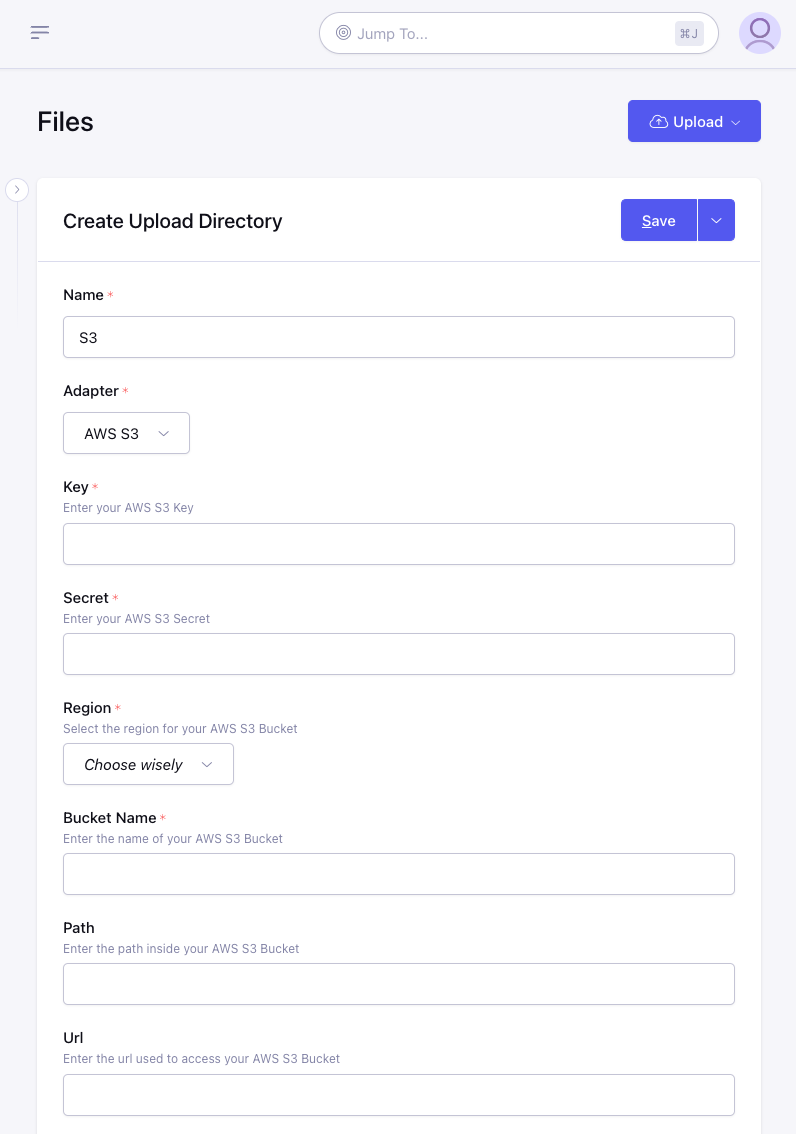
- Create a new Upload Directory
- Enter a name and choose "AWS S3" for the Adapter
- Enter the "Access key ID" from Step 2.8 into the Key field
- Enter the "Secret access key" from Step 2.8 into the Secret field
- Choose the correct Region for this bucket selected during Step 1.3
- Enter the Bucket Name which was chosen during Step 1.3
- Optionally you can specify a Path inside your bucket where the directory should store files and folders. Please note this path is only used for file storage and manipulation, you may need to add this path to your Url as well depending on your configuration.
- Optionally you can specify a Url to use as the base when generating links to files in the bucket. This can be useful for having a CDN handle requests to your files. (Cloud Files will auto-generate a "path-style" url from your bucket configuration but if you need or prefer a "virtual-hosted style" url you can enter that instead)
- Continue to configure the directory how you normally would and click "Save".
